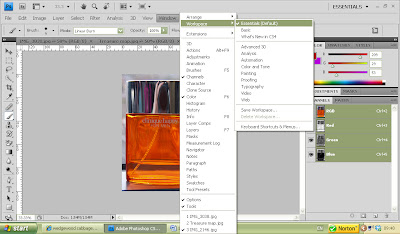
This will bring up the layers panel:
Shortcuts to change the look of the screen are:
• “F” changes the background colour from grey to black. (A grey neutral background is good for assessing images)• “Z” turns the zoom tool on and off
• Holding the space bar then clicking on the image allows you to position the image on the screen
To minimise the palettes use the >> key:
The required palette can then be dragged out and expanded using the << key:
In the layers palette the symbols have the following meanings (see numbered screen print below):
1. The eye symbol indicates that the layer is visible, there is a thumbnail which previews the layer and the title of the layer is shown (the title can be changed by clicking on it).
2. The padlock indicates that the layer is locked and cannot be changed. The background layer is always locked. Other layers can be locked if required (see below).
3. The trash can – layers can be dragged and dropped in here to delete them.
4. The new layer symbol – a layer can be duplicated by dragging and dropping it here
5. The group folder – layers can be grouped into sections for ease of working by dragging and dropping the required layers into the group folder which can then be named. This is useful if working with lots of layers.
6. The fill layer – this can be used to adjust the background layer.
7. 8,9 and 10 – lock the pixels, position or all of the layer so that it can’t be changed accidentally:
From the tool bar selecting “Image”, “Adjustments”, “Levels” brings up a histogram which can be used to adjust the exposure levels using presets or your own settings:
Also on the “Image”, “Adjustments” menu are lots of other options such as the option to change the image to black and white. Many of the adjustments have an opacity tool for fading in and out the level of adjustment.
Also on the right hand palettes is the layer adjustment palette, which has buttons allowing adjustments to:
Brightness
Levels
Curves
Exposure
Vibrance
Hues/saturation
Colour balance
Filters
Posterize
etc
Layer styles can be changed to give various different effects such as darkening, lightening, vivid light (shown below) etc
Layers can also be flattened – this is like stacking a deck of cards in that you can only see the front card and the others are all hidden behind. In effect it tidies up all your layers once you have finished working on the image.


No comments:
Post a Comment